





- Drain all new and used fluid from the BG TFX.
- Recharge the BG TFX using the BB01 Recharge Adaptor.
- Purge the BG TFX to bring the puck to the top of the Transmission Fluid Tube (T).
Refer to the BG TFX Service Instructions for recharging and purging the transmission fluid.
- With the Transmission Fluid Tube (T) empty and the puck at the top, verify there is no residual pressure in the tube by pressing and holding the Pressure Release (PR) button.
- Remove the Excess Fluid Container (X) and all loose adaptors and items from the machine.
- Gently lay the BG TFX down on its right (adaptor) side with the Transmission Fluid Tube (T) side up to access the bottom of the machine.
- Loosen the hose clamp and remove the hose from the barb attached to the Base Plate Thru Plug.
- Remove the Base Plate Thru Plug with a 24mm wrench.
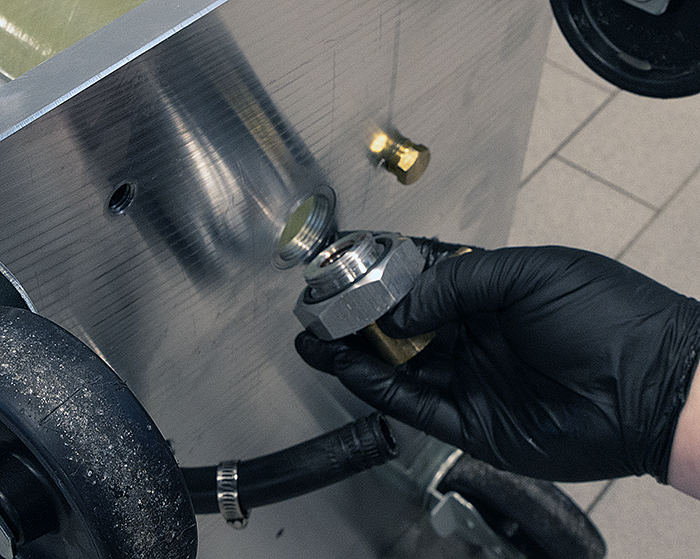
- Assemble to snug the number of BB03 1-Quart Puck Stops, PN E101-7547, together to achieve the desired service capacity. Each BB03 1-Quart Puck Stop decreases the service capacity by one quart.
- Assemble to snug the Puck Stop assembly to the Base Plate Thru Plug.
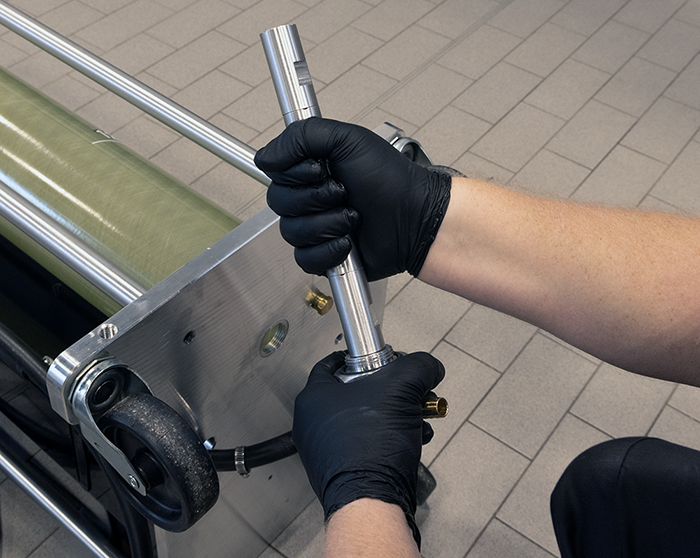
- Reinstall the Base Plate Thru Plug into the Base Plate and tighten until the hose barb aligns with the hose.
- Reattach the hose and install hose clamp to snug.
- Carefully set the BG TFX upright and replace adaptors and Excess Fluid Container (X).
- Recharge using the BB01 Recharge Adaptor to lower the puck to the Puck Stop.
- Verify there is no residual pressure in the Transmission Fluid Tube (T) by pressing and holding the Pressure Release (PR) button.
- Pour into a clean container at least one quart of transmission fluid per BB03 1-Quart Puck Stop installed.
- Attach open-end adaptors to the end of both Service Hoses (H1 and H2) and place the end of the Marked Service Hose (H1) into appropriate used fluid receptacle. Place the open-end adaptor of the Unmarked Service Hose (H2) into the transmission fluid from step 14.
- Turn Service Selector (V1) to “OFF” (O), Correct Flow Knob (V2) to “P1”, and connect the machine to shop air.
- Turn Service Selector (V1) to “SERVICE” (S). Ensure the open-end adaptor on the Unmarked Service Hose (H2) remains continuously submerged in the fluid to allow the setup to work properly.
- When all the fluid has been pulled into the used side of the machine, turn Service Selector (V1) to “OFF”
- Disconnect Shop air from the machine. Press and hold the Pressure Release (PR) button to bleed any residual pressure.
- Recharge the machine using the BB01 Recharge Adaptor to remove all air on the bottom side of the puck.
- Release pressure in the Transmission Fluid Tube (T) by pressing and holding the Pressure Release (PR) button.
- If there is an air pocket beneath the puck, add more fluid to the clean container from step 14 and repeat steps 16–21.
Note: Failure to add enough transmission fluid after installing the retrofit set may result in the first service being critically low after servicing. - The BG TFX is now ready for use.